Kindergarten Activity No. 53: Planting a Flower Seed

Planting a Flower Seed

Planting is a children’s favourite gardening and science activity. Children like to observe the plants’ growth and at this time of year this would be a great activity to carry out with your children at home.

Children fascinate themselves watching the first green shoot coming out of the soil. They enjoy taking care of their plant by watering it.

During this activity you can use different seeds so that children can compare their sizes and appearances.

Children can benefit and acquire different skills from this gardening activity such as:

  • develop patience while waiting for the seed to grow into a flower,
  • learn about how to be responsible while taking care of the plant,
  • learn about the life cycle of a flower,
  • develop fine motor skills,
  • spend quality time and create a bond with the parent.


Click here for a child friendly video explaining how plants grow.

Before starting the activity, watch this online story.

We plant seeds – Click here

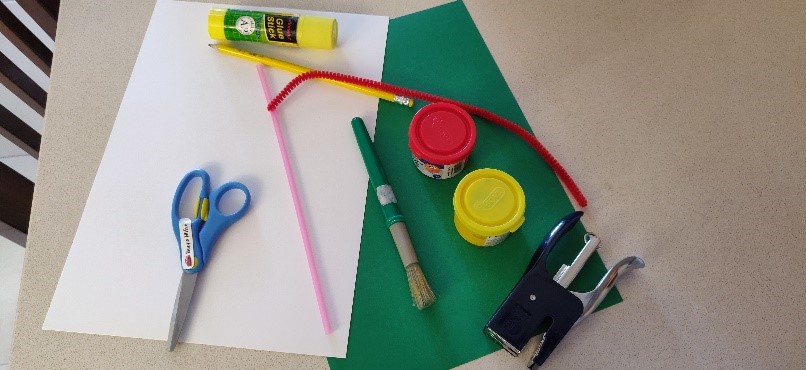
For this activity you will need:

  • soil
  • pots
  • seeds
  • water spray bottle
  • water
  • scoop

Steps how to plant a seed:

  1. Give your child some soil, and ask him/her to fill the pot, leaving about 2cm, to the top. Encourage him/her to count out loud each time s/he scoops the soil.
  2. Place some seeds on the palm of your child’s hand. Encourage him/her to count how many seeds s/he has before planting them.
  3. Once the seeds are planted ask your child to place a little more soil on top of the seeds and to press lightly.
  4. Explain that the seeds need water to grow. Give your child a spray bottle so they can mist the soil.
  5. Ask your child to find a place in the house where to put the planted seed. The place must have enough light for the plant to grow.  This could be a windowsill, a yard, or a balcony.


Below you can  find a worksheet the children can do about the life cycle of a flower.

worksheet life cycle of a flower


You can also take this activity a step further and create a cute clay pot doll for your plant. This would be an ideal gift for Mother’s Day. Children can paint and decorate the clay pot however they like with any materials they want such as paint, glitters, markers, buttons, beads, cloth, felt, etc… This needs to be done before planting the seeds, so that it will dry completely.

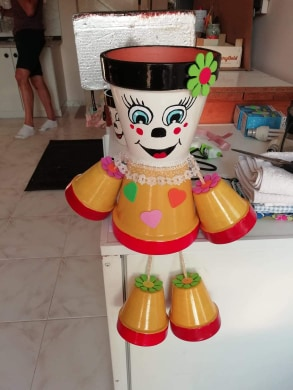
Click here to watch these YouTube videos showing you how to make cute clay pot dolls.

Clay pot people

DIY Clay pot people


I would like to take this opportunity to wish you all the love, health, and happiness that you deserve. Happy Mother’s Day!


Ms. Maria

K2.2

Kindergarten Activity No. 52 : Mother’s Day flower craft


A mother is like a flower; beautiful and unique.


As you all know next Sunday is Mother’s Day. Usually, at this time of the year, at school we prepare a craft for this special day.  Today I have prepared a flower craft for you to do with your child.

It is important that before you start doing this craft your child understands what Mother’s Day is.  Start by getting a calendar. Children are already familiar with the days of the week and months of the year since at school they do the calendar routine every morning.  Go through the months of the year and find May. Then go through the days of the week and find Sunday 10th May. Tell your child that this is a special day because it is Mother’s Day.

Explain that on Mother’s Day we thank our mother for all the things she does for us.  Tell your child that you are going to do a flower craft together for Mother’s Day.

This activity involves scissor cutting, tracing, painting, and gluing.  These activities contribute to the development of fine motor skills and hand eye co-ordination. Fine motor skills develop with practice and are important for handwriting.

For this craft you need:

  • 1 white A4 cardboard paper
  • A piece of green cardboard paper for the leaves
  • A pencil
  • A pair of scissors
  • Paint (choose two different colours)
  • A paintbrush
  • 1 pipe cleaner
  • A Straw
  • Glue
  • Stapler

Method:

  • Encourage your child to trace his/her hand twice on the white A4 cardboard paper. Please note that some children might need help to do this.


  • Encourage your child to use the scissors to cut the handprint out. Do not seek perfection.


  • Ask your child to pick any two paint colours s/he likes to colour the handprints. If you are using one paint brush it is important that you clean the brush each time you change colour. Once the colour is dry, paint the other side of the handprint.

  • Help your child draw 2 leaves on the green paper. Alternatively, you can draw the leaves on a white paper and colour them. Use a pair of scissors to cut the leaves.

  • Once the paint is dry, take the handprints and put some glue on the palm of the each print.

  • Take one handprint, fold it, and glue it together, leaving a space to insert the the straw. Then wrap the other handprint around the first handprint. Now insert the straw and press firmly. (As indicated in the picture).

  • Ask your child to gently roll the finger tips outwards to form petals.


  • Glue the leaves to the straw, then turn the pipe cleaner around the straw to form a bow. You can staple the bow and the leaves to the straw in order to hold firmly. (As indicated in the picture)

Dear children now you have a beautiful hand made flower to give to your mother. You can spray some perfume to make it smell as a real flower.

Hope you enjoyed it!

Attached you can also find a song you can sing to your super mummies on Mother’s Day.

https://www.youtube.com/watch?v=HL5GUuK49Ag

Happy Mother’s Day!

Ms Rosanne Mifsud

Kindergarten Activity No. 51 : Counting Words in a Sentence


Counting words in a sentence, known as sentence segmentation, is a phonological awareness activity. Phonological awareness is the ability to listen to the sounds in a word. Phonological awareness prepares children for reading and writing. Teaching children to hear the words in a sentence is the first step in phonological awareness. It makes children aware that a sentence is made up of words.

Since this activity focuses on phonological awareness, it is important not to show the written sentences to the children.


For this activity you need:

  • A 5 square strip of paper (you can make it from a piece of cardboard paper or from a cereal box).


  • For counting you can use either bottle caps, buttons, counters, or circle cut outs.

 Instructions:

  1. Put the counters on the board and tell your child that each counter represents a word.

2. Explain to your child that you are going to say a sentence twice. Emphasise the importance of listening carefully.

Say a simple sentence, for example: “The dog runs”.


3. Tell your child that you are going to say the sentence again. Say the words in the sentence clearly, while making sure to pause after each word. This time s/he must repeat the sentence after you while putting a counter, onto the square on the grid, for each word s/he says.

While saying – ‘The dog runs’, your child should put three counters on the grid.

4. When finished repeat the sentence together. While saying the sentence point to the counters one a time.

5. Ask your child: “How many words does this sentence have?”

The child should say: “3”

Note:

  • Start this activity with short sentences, then gradually increase the length of the sentences.
  • Have the child place the caps from left to right, as this will help for directionality.


Variation: The child can also clap or stomp the words in a sentence. Say the complete sentence and then encourage him/her to repeat the sentence while clapping or stomping for each word. This activity can also be done while reading story books.

Example of sentences to use

Ms Rodianne

K2.1